Review – LowePro Outback 300AW
 In the past, I have always used backpack style camera bags. I thought that I would mix it up a little and try out a few bags that might show the different varieties that LowePro has to offer. So, I have been trying out the LowePro Outback 300AW beltpack bag for the last few months.
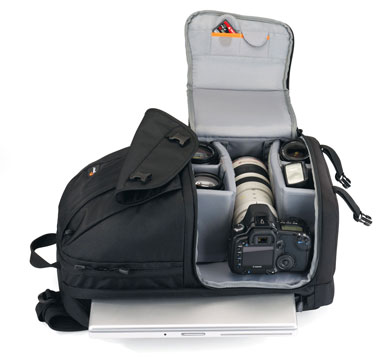
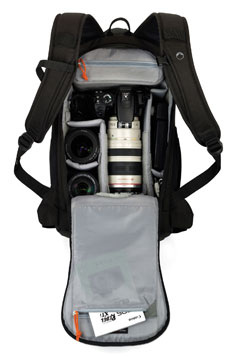
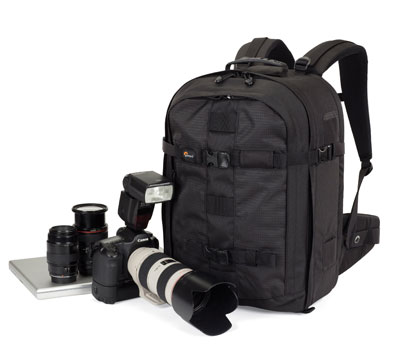
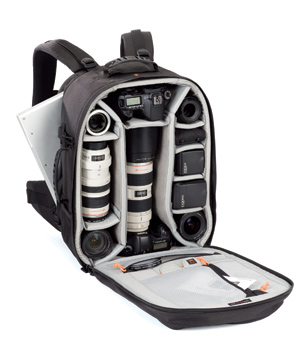
First off, the Outback 300AW has a ton of space. One of my favorite features is the dual lens pouches on the outside of the bag. There is one on either side, freeing up space inside the bag for more camera gear. Once I put my two spare lenses inside the pouches, I had a ton of room for the camera and a few spare lenses inside the main compartment. The main compartment can be configured in a large number of ways to accommodate your camera body and lenses.
On the lid of the main compartment, there is a large velcro pocket and four small velcro memory card pockets. The zippers on the lid of the main compartment have teardrop shaped pulls with a rubber (plastic?) semi-circle that make them a breeze to pull.
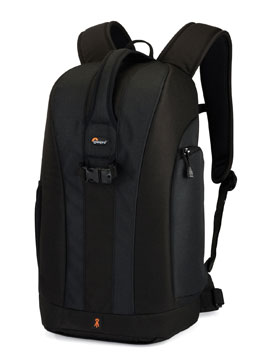
The front of the bag has a large zippered pocket for storage. Inside this pocket are three wide pockets that would be good for storing small tablets, batteries and business cards. There is also a large mesh pocket that covers the width of the bag.
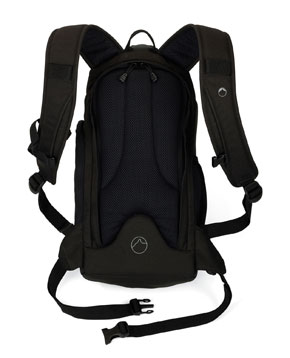
The back of the back has a strap that would hold the bag in place when placed on your luggage while traveling. The shoulder strap is held in place with heavy D-rings and has a very nicely padded pad for comfort. This bag is also equipped with a waist strap. The waist strap is very heavily padded and will allow you to spin the bag around your waist while using it for easy access. Underneath the padding for your back, there is a weather proof cover. This cover easily comes out and covers the bag should you get caught in a storm.
Overall, I really like this bag. As I stated earlier, I have previously always used backpacks. This was a nice change and opened up my eyes to other options. I highly recommend this bag.
Here are the specs and technical information from LowePro‘s site:
Capacity:
Pro DSLR with grip and standard zoom lens (up to 70-200 f/2.8) attached; 3-4 extra lenses or flash; accessories
Size(Interior):
10.6W X 6.7D X 11.8H in./
27 X 17 X 30 cm Size(Exterior):
21.7W X 9.3D X 12.4H in./
55 X 23.5 X 31.5 cm Outer fabric:
600D Nylon PU, 210D Nylon PU, Nylon Webbing, Polypropylene Webbing, Velex PU
Interior Fabric:
210D Nylon PU, Velex PU, PE Foam, EVA Foam, Brushed Tricot, Nylon
Weight:
3lbs/1.4kg
The Outback 300AW is available in Black and has a Suggested Retail Value of $129.99.
**Images courtesy of LowePro.
**LowePro sent me this bag to review. After my review, I will send this bag back to them
Review – LowePro Classified 250AW
For a little bit of a change, I asked the folks at LowePro to send me a shoulder bag for my latest review. They sent me the Classified 250AW. The Classified 250 AW has room for 1-2 SLRs with a lens attached, 2-3 more lenses and up to a 15.4 inch laptop.
I was heading down to the PhotoPlus Expo in New York City, so I decided to bring the bag along to test it out. I knew I would need space for things I was going to pick up throughout the day, so I took out a lot of the separators and put in the bare necessities for camera gear. I took my body and two lenses, put them in one side of the main compartment, and left the rest for storage.
Using the luggage sleeve on the back of the bag, I attached it to a rolling bag that I was also bringing along for the show. It was the perfect fit and made my life a lot easier that day.
The front of the bag has a flap that hides two large velcro closure pockets for storage and another large pocket that runs the full width of the bag. The large pocket can hold a lot of extras and includes a key clip and a memory card holder. The memory card hold will accept up to 6 memory cards. It rolls up nicely and seals with velcro. In this section, there is also an zippered section that will allow the bag to expand for a little more room.
On the back side of the bag, along with the luggage sleeve, there is another pocket. The pocket is thin, but is as deep and wide as the bag. On the bottom of the bag, there is a velcro pocket that hides the All Weather Cover. Just slip it out and right over the bag for protection from the elements.
I really liked the many uses of this bag. It not only makes a great camera bag, but also a great laptop bag. While not it’s intentional use, I really liked using the extra room in it for carrying information and items picked up at the PhotoPlus Expo. This is a great bag! I highly recommend it.
Here are some specs from LowePro‘s site:
Capacity:
1-2 professional DSLRs with 70-200 f/2.8 lens attached plus 2-3 additional lenses or flash, plus 1 widescreen notebook up to 15.4″ (most models)
Size(Interior):
15W X 6.3D X 11H in./38 X 16 X 28 cm Size
(Exterior):
18.3W X 11D X 14H in./46.5 X 28 X 35.5 cm
Notebook Compartment Inner Dimensions:
13.8W X 1.4D X 11H in./35 X 3.5 X 28 cm
Front Compartment Inner Dimensions:
6.7W X 1.2D X 8.7H in./17 X 3 X 22 cm
Outer fabric:
840D x 150D Nylon Poly Blend PU, Full Grain Leather, 420D Nylon, 1680D Nylon PU, Dry Flo Mesh, 190t Nylon PU
Interior Fabric:
Velex PU, 210D Nylon PU, Brushed Tricot Nylon
Weight:
4.2lbs/1.9kg
The LowePro Classified 250AW is available in Black or Sepia and has a MSRP of $229.99.
Review – Engraved Marble Photo Keepsake
 A few weeks ago, I was contacted by Dakota’s Personalized Gifts. She asked if I would be willing to do a product review for her company, and I was more than happy to oblige.
I chose the Engraved Photo Marble Keepsake and sent in a picture of Isabella for them to use. Within a few days, I had this item in my hands. I was really surprised at the quick turn around. They have some great photo gifts on the site.
When I opened the package, I found a nice, solid piece of marble with a beautiful engraving of the photo I sent in. The edges have a really cool ‘wavy’ texture to them, along with a black and white marble combination. I am really pleased with the quality of this product.
You’ll notice our star model posing with her picture throughout this review. Isabella approved of this product as well. It was originally her Christmas picture. Here is the original and the finished product.
Here is a bio from Dakota’s Gifts;
We started in a spare bedroom about 5 years ago more as a part time hobby than a business with The Anniversary Rose making roses for the traditional anniversary gifts (i.e. 1st year paper, 2nd year cotton, 5th year wood etc) cutting rose petals by hand with scissors. It quickly grew from a part time hobby to a full time business, adding help and equipment to keep up. Then, we started expanding into personalized anniversary gifts. We started getting many requests from our customers for personalized wedding, Mother’s & Father’s Day and Christmas gifts etc. That’s when we started Dakota’s Personalized Gifts. Soon the business took over a second bedroom and the garage, the following year it occupying two bedrooms, the garage & a full basement. With no room left to expand we were forced to move into a commercial location in 2009. We continue to expand with new products and updated equipment all the time which allows us to produce most of the personalized items in house.
Buy It:
10OFF50 for $10 off when you spend $50
15OFF75 for $15 off when you spend $75
GRD-OCT31 for free ground shipping when you spend $35
If you’d like to enter to win this prize, please follow this link to my new blog site to enter. I am migrating all further posts over there.
Review – Spider Camera Holster
The folks at Spider Camera Holster were kind enough to send me a Spider Pro System to try out. At first, I must admit that I was a little nervous to hang my dSLR off my belt and walk around with it swinging, but it proved to be quite a nice piece of equipment.
Last week, I put it to use at the University of Albany athletic fields. The New York Giants hold training camp here in August and I decided I would go down and practice my sports photography while trying out the Spider Pro System.
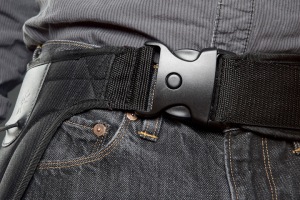
As I arrived at the athletic fields, I grabbed the heavy duty belt and clipped it on. My first thoughts were that the material and the and the buckle were both very heavy duty and made me feel a little better about hanging my camera from it. I then noticed that the clip that closed the belt not only had two finger releases to open it, but also a third release that wasn’t going to let the belt slip open and fall to the ground.
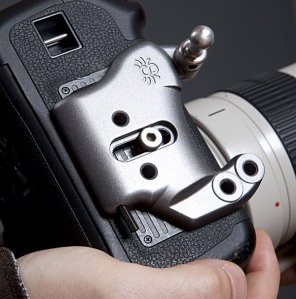
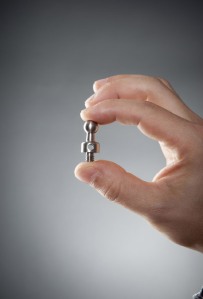
The main part of the unit was a base called the Spider Pro Plate. This plate comes with a built-in Allen wrench for attaching it to your camera. When you are done with it, simply slide it right into the plate until you need it again. It’s a great design idea! The plate has a Spider Pin attachment that connects your camera to the belt.
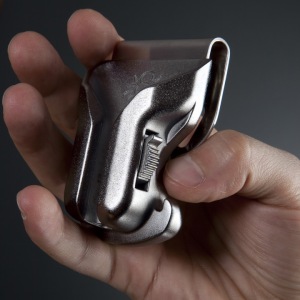
The Spider Pro Holster Box allows you to slide the Spider pin into it and lock it into place, assuring your camera wont pop out. There is a small latch you can flip that locks your camera into the Spider Pro for safety. Once in there, it will stay put and wont come out. Releasing the lock is just as simple. Just flip the latch the opposite way, and your camera comes right out.
I really enjoyed testing this product. It was a very useful tool in the field. If I needed to free up my hands to talk to someone or set up a shot, all I had to do was clip the camera into the Spider Holster and I was free to do what I needed to without having to set the camera down on the ground or back in my camera bag. I would highly recommend adding the Spider Holster to your collection of photo gear.
***Images courtesy of Spider Holster***
Review – LowePro FastPack350
After my review of the FlipSide 300, the folks at LowePro sent me the FastPack 350.
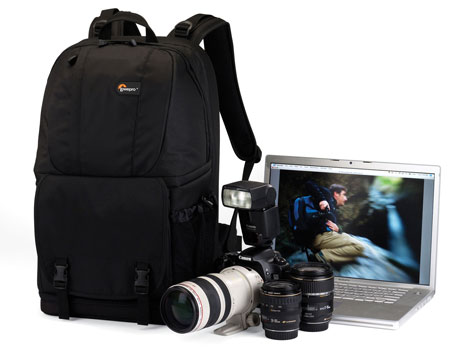
The FastPack 350 is a bit larger and has some extra storage space. It also has room for a 17 inch laptop. You might recall that in my review of the ProRunner 450AW, I had a difficult time fitting my laptop in. This was not the case with the FastPack 350. My laptop fit in much easier.
The FastPack 350 is set up a little differently than most camera bags I have used before. Your camera equipment goes in the bottom of the bag, and that section opens to the side instead of from the top. Inside this area, you can store a DSLR with with a 70-200mm lens attached, along with 2 or 3 extra lenses and a flash. There are also two velcro pockets that can hold memory cards.
Along the side of the bag, you will find a long zipper that opens to provide storage for up to a 17 inch laptop. As I mentioned earlier, my HP 17 inch laptop fit in there with no problem at all.
 The top portion of the bag opens to reveal a rather large storage area. Inside that storage area, there is a removable zippered pouch that will hold any extras you may be carrying with you. The storage compartment also has two velcro pockets that are great for holding extra batteries and remotes. Along with these pockets, there are pen holders, a mesh pouch and a clip for your keys. On the outside of this compartment, there is a zippered pocket that leads to even more storage space. This bag has quite a bit of room!
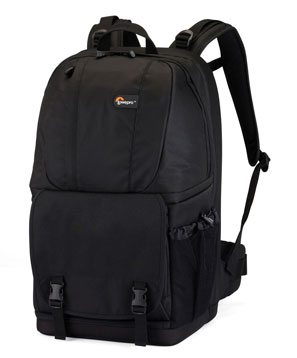 Just like the other bags I have tested for LowePro this bag has ample padding on the shoulder and waist straps, as well as the back area. When I was wearing this bag, it was comfortable and did not feel like it was too heavy. I even took it on the motorcycle one day just to try it out. It worked just fine on the bike, although I did not have my laptop in tow.
Specifications and Description from LowePro’s site;
Capacity:
1 pro digital SLR with lens attached (up to 70-200mm f/2.8), 2-3 additional lenses or flash units, 17″ widescreen notebook, memory cards, batteries and cables
Size(Interior):
11W X 6.1D X 10.6H in./
28 X 15.5 X 27 cm
Size(Exterior):
12.4W X 9.6D X 19.3H in./
31.5 X 24.5 X 49 cm
Notebook Compartment Inner Dimensions:
11W X 1.5D X 18.9H in./
28 X 3.75 X 48 cm
Weight:
4.08lbs/1.85kg
Go all day with the lightweight, comfortable Fastpack 350 backpack. It protects your pro digital SLR and 17″ widescreen notebook compactly while providing generous storage for other gear. Side-entry compartments let you quickly grab equipment and accessories, even while you’re on the move. Customize the easy-to-access main compartment with adjustable dividers. A comfortable mesh waistbelt, and an adjustable sternum strap, help distribute weight evenly. To help you make the most of this Lowepro bag take a look at our new product video.
Price: $149.99
Colors: Black, Arctic Blue/Black, Red/Black
Pros
Fits laptops up to 17 inches
Extra storage space
Heavy padding for comfortable use
Mesh side pocket for carrying water
Cons
No All Weather cover
This has been yet another great bag from Lowepro. I really enjoy testing them, as they make a great quality bag. See ya soon!
*Images courtesy of LowePro
Review – LowePro FlipSide 300
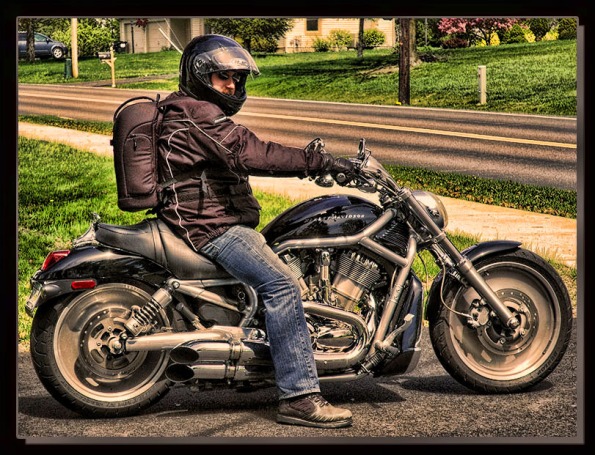
When I sent the LowePro Pro Runner 450AW back to LowePro after my review period was up, I asked for a bag that was a little smaller so I could use it when I was on the motorcycle. This way, I can combine my two loves – photography and motorcycles. They sent me the LowePro FlipSide 300. The FlipSide 300 is considerably smaller that the Pro Runner 450AW and a much better fit for the amount of camera gear I normally take with me when I go out shooting. But this bag is different…
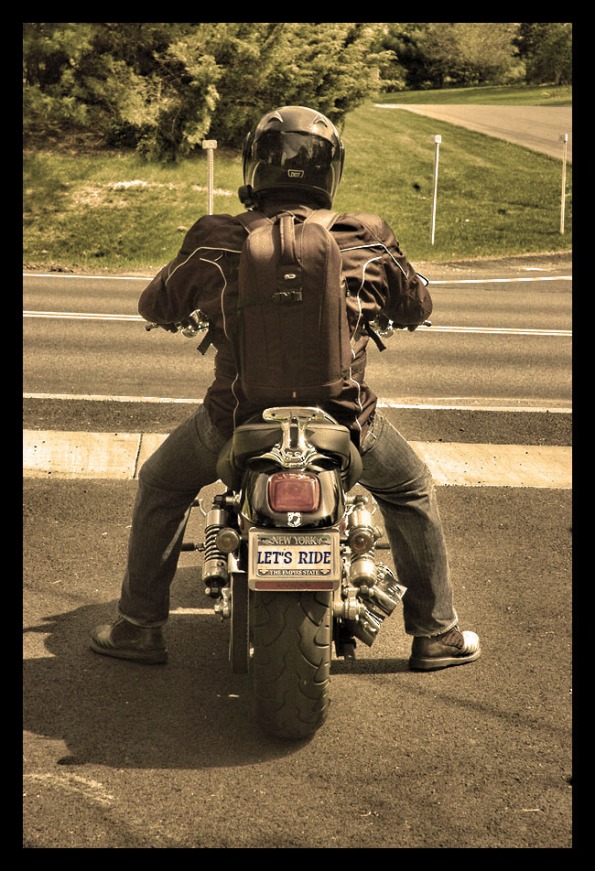
When I opened the box and pulled out the bag, I was thinking “what the ?” The zipper for the main compartment is on the part of the bag that goes up against your back. I don’t know if it was LowePro‘s idea or not, but I would think that this will keep water out of the main area your camera is stored in. Good thinking, LowePro. The bag also has chest and waist straps for secure and comfortable travel. The padding on this bag is also quite impressive. I wore it for four or five hours on the motorcycle and it was very comfortable.
When you open the main compartment, there is room for an SLR body with a lens attached (up to 300mm) and 1-3 additional lenses. There is a zippered pouch in the main compartment that lets you store memory cards, chargers, cords, or whatever you want to put in there. It is attached with velcro and can be moved or even removed if you want more space. With the bag open, the flap that swings down has a large zippered pocket in it. I am using this pocket to store filters and even a small notebook.
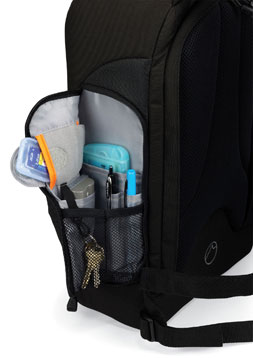
There is a handy media pouch on the outside of the bag that zips open to allow storage of pens, keys, and two velcro memory card pouches. There are two small pockets inside the media pouch as well. On the other side of the bag, there is a mesh pouch that I used for carrying a water bottle.
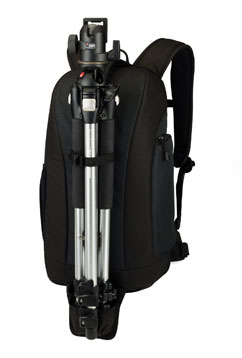
On the front of the bag, there is a really handy, durable grab handle built in. It is heavy duty with a textured under side to prevent slipping. Also on the front of the bag is a strap to tie down a tripod. At the bottom of the front of the bag, there is a velcro pocket that hides a tripod holder. The tripod holder holds the tripod in place and works in conjunction with the tie down strap.
So, let’s get into the nitty-gritty. Here are the specs from LowePro‘s web site;
Capacity: 1 Pro DSLR with 300mm f/2.8 lens attached plus 1–3 additional lenses or flash units, 1 tripod, multiple cables, memory cards, manuals and other digital accessories
Size(Interior): 9.1W X 5.4D X 15.9H in./ 23 X 13.8 X 40.5 cm
Size(Exterior): 10.2W X 6.9D X 17.5H in./ 25.8 X 17.4 X 44.5 cm
Weight: 2.6lbs/1.2kg
Price: $99.99
Colors: Black, Red and Black, Arctic Blue and Black
Pros
-Great size for hiking, biking
-Roomy interior
-Lightweight
-Durable
-Lots of pouches for storage
-Well-padded back and shoulder straps
Cons
-I haven’t found any yet.
I really love this bag. It is perfect for the amount of equipment I have and for using while I am on the bike. This is a bag I would really like to own. If you are in the market for a compact bag with plenty of room for a camera, two or three lenses and some miscellaneous other accessories, this might just be the bag for you. I highly recommend checking this bag out.
Here are a few pics of the bag in action.
See ya soon!
**Bag images courtesy of LowePro**
**Motorcycle images courtesy of Rose**
Teaser – LowePro Flip Side 300
When the folks at LowePro asked me what camera bag I would like to try out next, I asked them for one that would be a little smaller so I could wear it on the motorcycle. I spend a lot of time on the bike in the warmer months, and carrying a huge backpack is not only cumbersome, but also very uncomfortable. So, they sent me the Flip Side 300 to try out. Here’s what I think so far…
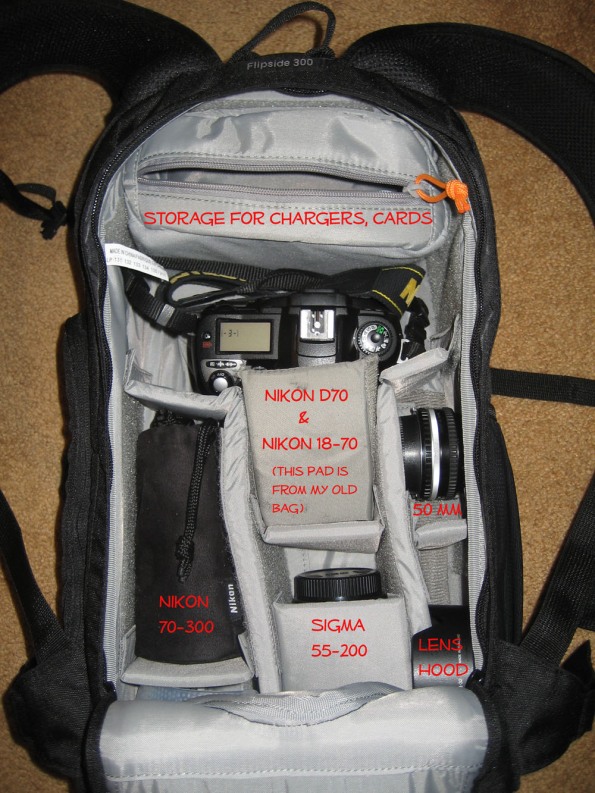
The bag seems to be the perfect size for the bike. It is also a great fit for the equipment I need on a shoot. I can fit my camera with a 18-70mm lens attached, a 70-300mm lens, a 50mm lens, and a 55-200mm lens. There is also a pouch inside for chargers and miscellaneous other goodies you might want to carry. I took a pic with a little point and shoot last night and labeled it with what I had inside the bag.
So far, I am very happy with this bag. I still have to get it out in the field and try it out to see how it functions. I didn’t get to take a ton of pictures yesterday, as it was gorgeous out and the motorcycle took precedence. Don’t worry, though – there will be plenty of pics over the next few weeks. Until then, you will have to wait!
Smart thinking!
Earlier in the week, I heard that Keeler Smart Center Latham was hosting a Smart Car test drive at Crossgates yesterday and today. I found out about it through Keeler’s tweets encouraging people to stop down. So yesterday, Rose and I stopped down to check it out. I had always wanted to drive one of the Smart cars, but never had the chance.
I had seen them for years before they came to the states a few years ago. In my travels to Europe, and at Lime Rock in Connecticut. The car at Lime Rock was most likely brought to the states and converted to US EPA standards. That was way back in the late 90s or early 2000s, long before they began importing them for sale here.
Recently, I had seen them on the road here and there in the Capital District, and even see one up the street at a neighbor’s house every day. It is bright yellow. You can’t miss it.
Two of the people at the event were marketing reps for Smart USA, and I also met John Sterrett from the Latham Smart Center. He went with me on my test drive. Great guy! We discussed the Smart car as well as sports cars and motorcycles. Who could ask for a better co-pilot? I got to drive the Smart ForTwo Passion Cabriolet in Blue Metallic and Rose drove the Smart ForTwo Passion Coupe in Red.
Here is the common misconception about these cars – they are incredibly roomy inside. The car had lots of legroom and quite a bit of headroom. There was even a decent amount of storage behind the seats for luggage or groceries, whichever you may be hauling. They come equipped with a 1.0 L, 71 HP, 3 cylinder engine. It’s not the fastest car you will ever drive, but it will pay off at the gas pump, as they get 41 miles per gallon according to the Smart USA website. With gas now back to over $3 a gallon, that plays a huge factor in many people’s decision of which new car to buy.
The other question a lot of people ask is about the safety of such a small car. The Smart ForTwo cars have a very high 5-star safety rating per the Insurance Institute for Highway Safety. That is pretty impressive in itself. I would feel very safe in this car. heck, it can’t be any worse that being on a motorcycle in traffic. At least people might see you in the car.
The event is going on tomorrow as well. Make sure you stop down and check them out. Sorry about the crappy pics. All I had with me was my cell and was shooting into the sun. I tweaked them a touch in Photoshop to make them little better. See ya soon!
Review – LowePro Pro Runner 450AW
The folks at LowePro were kind enough to lend me the Pro Runner 450AW backpack to try out. The 450AW is a very functional, high capacity backpack. This bag is large and in charge! It has tons of room for all of your camera equipment and even a slot for your laptop.
Inside the main compartment of the bag is room for two dSLRs and about 8 or 9 small lenses or 2 0r 3 large lenses. You can rearrange the dividers in a number of configurations to fit longer lenses or other gear as well. I don’t have that much equipment yet, so I used the space for chargers and other camera accessories I needed to take with me. As you can see in the picture below, there is ample storage in the three pockets shown when the main compartment is open. I used these pockets to hold extra memory cards, remotes and filters. When I asked LowePro for a bag to review, I wanted one that could accommodate my laptop. I have an HP 17 inch laptop and it was a little bit of a tight squeeze, but it fit in and I was able to take it with me. I used some of the extra room inside the main compartment to store my power cord for the laptop.
One of the things I really like about this bag is the amount of padding on the straps and waist belt. With the amount of equipment you can carry in this bag, the padding makes carrying it around all day much more comfortable. The padded straps definitely help distribute the weight and make it more manageable. There is also a lot of padding for your back to help absorb the weight. This bag is quite heavy when fully loaded with a laptop and all my camera gear, and I am not a little guy. I am about 5′ 7″ and about 200 pounds .
The front of this bag also has a large zipped storage area that can hold quite a bit. This area has a hook to hold your keys and two pockets to hold miscellaneous items you need to store. There is a hefty strap that keeps the bag shut and gives it extra support.
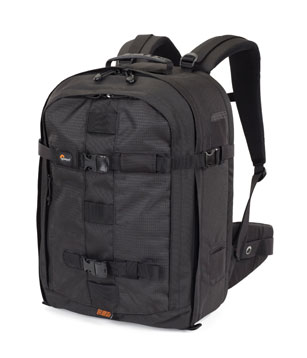 The straps also double as a tripod support. There is a movable base for the bottom of the tripod to go into that you can attach to the bottom of the bag using the two straps on the front of the bag.
The backpack also comes with a built in rain cover. It is built in and stowed away in a front pocket until you need it. It is tucked neatly in the under the front storage pocket, closed in with a nice Velcro tab (not shown). Another feature I really liked was a small storage pocket on the front of the bag. You can use this pocket for storing things you need to grab in a hurry, like a plane ticket or directions. The picture below also shows one of two handy grab handles for easier pick up.
Suggested Retail Price: $249.99
Specifications:
Exterior Dimensions – 13.4W X 11.4D X 19.9H in./34.0 X 29.0 X 50.5 cm
Interior Dimensions – 12.2W X 6.7D X 18.5H in./31.0 X 17.0 X 47.0 cm
Notebook Interior Dimensions – 12.2W X 1.8D X 15.6H in./31 X 4.5 X 39.5 cm
Pros:
- Ample storage space
- Laptop storage
- Well-padded straps and back area
- Grab handles for easy pick-up
Cons:
- Fully loaded it’s a bit heavy
Overall, I really liked this bag, but it is much larger than what I need. I don’t have enough equipment to fill it to it’s potential. For a real serious professional with tons of gear, this is the perfect bag. I would love to try a bag that is just a touch smaller to compare it to this one. I contacted LowePro about their bags because I have a LowePro Mini Trekker that I have had for 7 or 8 years that is still in great like new condition, despite me using and abusing it almost every day for the time that I have had it.
What bag do you use for your camera gear? Why do you love it/hate it?
**Photos courtesy of LowePro**
Gary Fong – “The Puffer”
A while back, my Speedlight decided to stop working. As you all know, the pop up flash on your camera can be pretty harsh, so I needed to find something that could replace the speedlight without the couple hundred dollar price tag. I did without for a while, but the results were not good. Harsh shadows behind people and flash glare ruined a lot of my shots.
I remembered that I had seen a vendor at the 2008 PhotoPlus Expo in NYC. They had some funky looking diffusers, but the lines were pretty long, so I moved on. I went into my local Ritz store to grab something quickly one day and I saw “The Puffer” on the shelf. After a few questions, I decided to pick one up. Heck, it was only $20, so if it wasn’t great, I hadn’t lost much. When I got it home I opened up the package and pulled out two pieces.
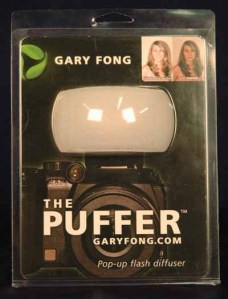
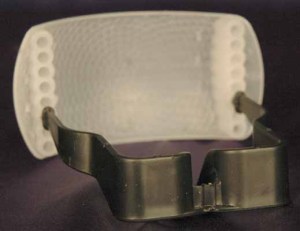
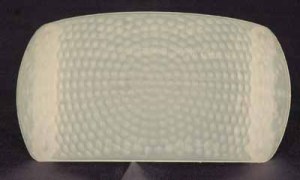
The two pieces were made entirely of plastic, and at first I was a little worried about snapping them when putting the device together or mounting it to the camera. The base is a formed plastic piece that will slide into the hot shoe. It has two small round dowels that slide into one of the eight holes on each side of the diffuser. The diffuser looks like a portion of a golf ball, with tons of dimples in it to diffuse the light. The back has 8 holes to raise or lower the diffuser depending on where you need more or less light. It is a little tight going into the hot shoe, but once it, it is very secure. It also seems to work pretty well.
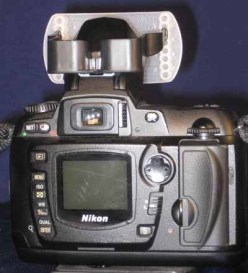
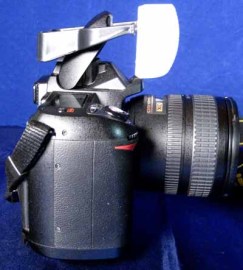
I also took some shots of the unit on my Nikon D70. The pics were taken with a little point and shoot, so they aren’t great. I took shots of the top and back to show what it looks like when mounted.
As you can see in the bottom picture, the diffuser was set on the second hole from the top. I would normally use it just below the middle hole to be aligned correctly with the on board flash. Here are four shots I took. Two were taken with the Puffer and two were taken without. Sorry for the food products, as they were handy, so I used them.
When I shot these photos, I did not change the settings on the camera. The only difference was whether the Puffer was on or off the camera. You can see a huge difference in the brightness and colors in both pictures that the flash was used on.
I would have to say that the Gary Fong “Puffer” is definitely worth the money. I have used it in a few situations and it seems to do the job a lot better than the on board flash would do.


